Monday, December 14, 2009


Another project complete! On a recent trip thru WV, we ran onto a small quilt shop, where I found a package of 5" squares by Moda, called "Figgy Pudding". Bought 'em, but had no idea what I'd do with them. (But, the best thing about this stop, was that the shop had just installed a long arm quilting machine, and they let me try it out! That was really fun. I guess they were planning to start offering a quilting service to their customers.)

So, the package of squares -- I guess they're called charms -- was a challenge. Each square was different, but in coordinating colors and styles. I found a pattern called panache on the web, and thought it would be a good way to use the charms. Hardest thing was picking out the additional fabrics I needed for the backgrounds and "setting" squares. But, after a couple of hours at Jo-Anns, I settled on a pine green material that has little colored spots that look like Christmas tree bulbs, a subtle red print, a deeper red with spots for the binding, and muslin for the setting squares and the backing.

After I got started, I realized I had gotten almost twice as much fabric as I needed : the original pattern was for 10" squares, while mine were 5". So, I cut all the amounts in half. But, a 5" square is 1/4 of a 10" square ... duh. The overall dimensions end up being about 1/2 of the original, tho. ANYWAY, I had fabric left over, as well as a bunch of half-square trianges from the setting squares of the main quilt, so I came up with a couple of pillow designs. I had been wanting to try prairie points, so I did those around the edges of the pillow. Not sure I like it, but it was fun trying it out. It's a little too "fussy" for my tastes.

I was quite pleased with the machine quilting on this. The back thread is green and red, and its almost as interesting as the front!




Saturday, December 5, 2009


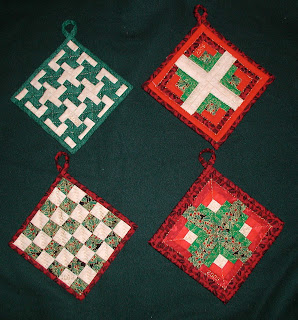
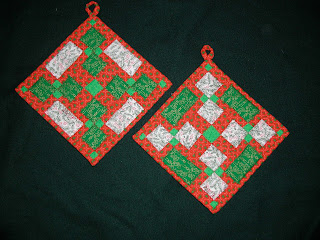
I've been busy! Getting more practice doing hotpads and placements for Christmas. I tried cutting my binding for the placements on the bias, and like it a lot. The "corners" are 45 degrees instead of 90, and the bias seems to work better.


Tuesday, November 24, 2009

Alice in Alamance


I got inspired to create a quilt to depict one of the huge old oak trees that we have in our yard. Originally, there were 4 such trees, but we had to take one down several years ago, as it was dying and threatened to fall on the house. We believe the trees are close to 200 years old. My husband named the tree Alice, for the woman from whom we purchased our property. And, our place in Alamance County is truly a wonderland for us; hence the name "Alice in Alamance"

I made the main part of the quilt totally from "disappearing 9-squares". I invented some oak leaf blocks for the corners of the trim. It was really fun doing this one! Here's the quilt, and a photo of the actual tree.


Saturday, October 24, 2009

Pot Holders

I've been experimenting with different blocks, and making them into pot holders to get experience with the quilting, framing and binding techniques. Found some material (looks like batting, but is especially for heat resistance) that you include along with batting to make these useable as hot pads.

Here's my first one. I was running low on scraps, so I only did a single layer on the binding, and just did lapped corners. This block is called card trick:

It actually looks "neater" if you rotate it 45 degrees, but I can't get my photo software to do that for me ... if I figure it out, I'll add another picture here!


The next one didn't come out so well. I didn't intend to use the blue initially. I was going to use the same bright red as in the middle, for all the little triangles. But I mis-cut my red pieces, and didn't have enough to re do it So, I decided on the blue. There is some blue in the light-colored background fabric, so it's "OK", but not my favorite combination of colors. I messed up the settings on my machine when I quilted it, so that didn't come out so well either. But, I do like the pattern on the back. This one does have a double layered, miter-corned binding:


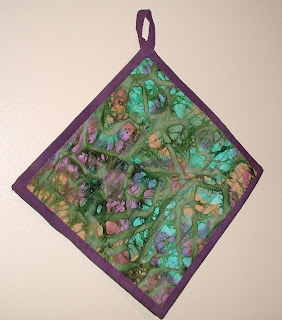
Now on to my favorite. This is a block made from 4 smaller blocks. They are all disappearing 9-squares. I really like the secondary color combination of orange, purple and green. I found some batik fabric at a store up in Fancy Gap, and used it for a border and for the back. This one has binding with mitered corners, but only one layer of fabric

Friday, October 16, 2009

First projects


Here's the 1st block I did, a 5x5 pattern.  It's now hanging on the fridge. 


Had lots of fabric left, so did this woven pattern, using the half/seam technique I read about in a book.  Putting the trim around the edge was the challenge here.


Thursday, October 15, 2009

Starting up ...


Wanted to be able to participate in the quilter's festival, so had to learn how to create a blog! Sorry there's not much else here yet ...


I started quilting a couple months ago. My first project was a 5-square block design I found on the web. It came out great, but I quickly realized that following someone else's design was not that interesting for me. So I decided to create my own.

I came up with a 9-square kaleidoscope design that I felt needed some really bright colors. Off to the local quilt shop, where I found the perfect fabric. A local artist had hand-dyed pieces in really nice colors. She sold packages of 20 6x9 squares, each a different color, as well as 1/4 yd pieces. 

So, I put the 9x9 design together, and was really pleased with it, except for the bulk of some of the intersections. I couldn't figure out a way to press them to get them all to lock together nicely.

Then the question was, what next? I have been wanting to try quilt-as-you-go, so I made a top and bottom panel, using a row of "diamonds" in each one, and a couple of side panels. After machine quilting all the sections, another lesson was learned. Your quilting design can really change the size of your blocks!

The large 9x9 was 19.25 inches when I started, and 18.5 after quilting. The top and bottom panels were 19.25 when I started, but 19 when I finished. So I had to trim quarter inch off each end of the panels. I lost the nice points on the end diamonds, but oh well!

The process of joining the sections went really well. Then I tried putting the binding on totally by machine, based on a video I found on you-Tube. That was a challenge. I think I need a better machine for that.


Anyway, I love the final quilt. I used a nice soft yellow flannel for the backing, thinking that the quilt might go to the next new baby in the family, but I don't know that I'll be able to give it up!